Tag: Claude Code

  • How to Create and Install a Claude Code Skill (Complete Setup Guide)

    How to Create and Install a Claude Code Skill (Complete Setup Guide)

    A Skill is a folder with one SKILL.md file that teaches Claude Code a repeatable task or a piece of standing knowledge — a code review checklist, your team’s API conventions, a release process. Claude reads the description and pulls the skill in automatically whenever it’s relevant, no manual invocation needed. This guide builds one from scratch.

    Quick Start

    Create a personal skill that works across every project on your machine:

    mkdir -p ~/.claude/skills/api-conventions

    Then create ~/.claude/skills/api-conventions/SKILL.md with a frontmatter block and instructions (see Step 2 below). Claude Code picks it up on its next session start — no restart command needed. Total time: about 5 minutes.

    ⚡ Copy This Prompt: Let Claude Code Build the Skill For You

    Skip Steps 1-4 below entirely and hand the whole thing to the agent instead — Claude Code can create the folder, write the SKILL.md, and validate it in one session:

    You have file access in this project. Do the following and report back — do not tell me it's done unless step 4 actually confirms it:
    
    1. Ask me what recurring task or piece of knowledge this skill should cover, and whether it should be personal (~/.claude/skills/) or project-scoped (.claude/skills/).
    2. Create the skill folder and a SKILL.md file at the right path.
    3. Write the frontmatter (name, and a description phrased the way I'd naturally ask for this task) plus the instructions body, based on what I told you.
    4. Run `ls .claude/skills/*/SKILL.md` (or the personal-path equivalent) to confirm the file exists, then run `claude plugin validate .claude/skills` to confirm the frontmatter parses cleanly.
    5. If validation fails, do not report success — tell me the exact error and fix it.

    The agent writes the file, then re-checks it exists and parses cleanly before telling you it’s done — instead of you writing the frontmatter by hand.

    What You’ll Need

    RequirementWhy You Need ItTime
    Claude Code installedSkills are a built-in feature — no extra package to add0 min
    A text editorTo write the SKILL.md file’s frontmatter and instructions0 min
    A recurring task in mindSkills are worth building for anything you’d otherwise re-explain repeatedly~2 min to define

    Step-by-Step Setup

    Prefer to do it by hand instead of delegating to the agent? Here’s the manual version of the same steps.

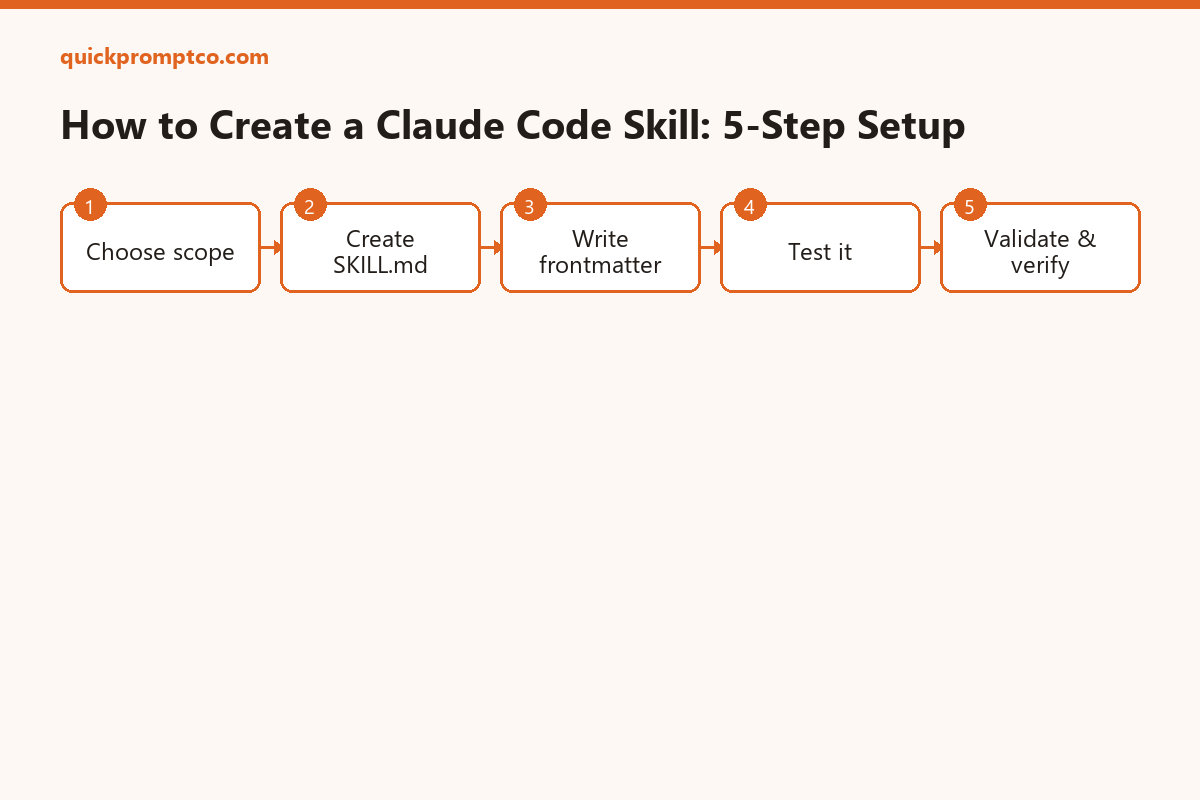
    Step 1 — Choose personal or project scope

    ~1 min

    Personal skills live in ~/.claude/skills/ and apply to every project you open. Project skills live in .claude/skills/ at your repo root and are loaded for anyone working in that repo (and its subdirectories, all the way down). Use project scope for team conventions, personal scope for your own habits.

    Step 2 — Create the skill folder and file

    ~1 min

    Each skill gets its own folder containing exactly one SKILL.md:

    mkdir -p .claude/skills/api-conventions
    touch .claude/skills/api-conventions/SKILL.md

    Step 3 — Write the frontmatter and instructions

    ~2 min

    The opening --- must be the very first line of the file for the frontmatter to parse. description is what Claude matches against your requests, so write it the way you’d naturally ask for the task:

    ---
    name: api-conventions
    description: REST API design conventions for our services
    ---
    # API Conventions
    - Use kebab-case for URL paths
    - Use camelCase for JSON properties
    - Always include pagination for list endpoints
    - Version APIs in the URL path (/v1/, /v2/)

    Optional frontmatter fields: disable-model-invocation: true makes it callable only via /api-conventions, never triggered automatically; allowed-tools restricts which tools Claude can use while the skill is active.

    Step 4 — Test it

    ~1 min

    Start (or restart) a Claude Code session in the project, then ask a question that matches the description naturally — Claude should pull the skill in on its own. To force it regardless of description matching, call it directly:

    /api-conventions

    What Each Piece Does

    PieceWhat It Does
    nameSets the skill’s invocation name; without it, Claude falls back to the folder name
    descriptionWhat Claude matches against your requests to decide when to auto-trigger the skill
    disable-model-invocationTurns off automatic triggering, leaving only manual /name invocation
    allowed-toolsLimits which tools are available while this skill’s instructions are active
    Skill body (below frontmatter)The actual instructions Claude follows once the skill is loaded

    Verify the Installation

    Confirm the file exists and the frontmatter parses cleanly:

    $ ls .claude/skills/*/SKILL.md
    .claude/skills/api-conventions/SKILL.md

    $ claude plugin validate .claude/skills
    ✔ api-conventions: valid

    Run the same two commands yourself:

    ls .claude/skills/*/SKILL.md
    ls ~/.claude/skills/*/SKILL.md
    claude plugin validate .claude/skills

    Inside a Claude Code session, ask “What skills are available?” — your skill should appear in the list. If the frontmatter has a YAML syntax error, the skill still loads but with no description to match against, so it’ll only work via manual /name invocation.

    Common Mistakes to Avoid

    • Opening --- isn’t on line 1. Any blank line or comment before it means the frontmatter won’t parse at all.
    • Vague description. “Helps with APIs” won’t match much. Write it the way you’d phrase the actual request, with the keywords you’d naturally use.
    • More than one SKILL.md per folder. Each skill needs its own dedicated folder — don’t stack multiple skills’ instructions into one file.
    • Expecting a skill below your working directory to load automatically. Claude Code loads project skills from where you started up through parent directories to the repo root — not from subdirectories below that, unless you explicitly add that directory to the session.
    • Assuming /name working means the description-matching works too. A skill with a broken frontmatter is still manually callable, which can mask the real problem — run the validator instead of just testing the slash command.

    Q&A

    Do I need to restart Claude Code after adding a skill?

    Personal and project skills are picked up on the next session start. Skills in directories added mid-session (via /add-dir) also load at that point without a full restart.

    Can I just have the agent build the skill for me?

    Yes — that’s what the copy-paste prompt above is for. Claude Code can create the folder, write the SKILL.md, and run the validator itself instead of you writing the frontmatter by hand.

    Can a skill call other tools automatically?

    Yes, unless allowed-tools restricts it — by default a skill’s instructions run with the same tool access as the rest of the session.

    What’s the difference between a skill and a slash command?

    A skill can trigger automatically based on its description matching your request. A plain slash command only runs when you type it explicitly — skills with disable-model-invocation: true behave like slash commands.

    Can I share a skill with my team?

    Yes — put it under .claude/skills/ in the repo and commit it. Anyone who clones the repo gets it automatically.

    Official Resources

  • How to Connect an MCP Server to Claude Code (Complete Setup Guide)

    How to Connect an MCP Server to Claude Code (Complete Setup Guide)

    MCP (Model Context Protocol) servers give Claude Code access to outside tools and data — a Notion workspace, a Playwright browser, a private API. Claude Code has a built-in claude mcp command for adding, checking, and removing these servers without touching a config file by hand. This guide walks through both connection types and how to confirm one actually works.

    Quick Start

    Connect a remote HTTP-based MCP server in one line — no local install, no package to run.

    claude mcp add --transport http notion https://mcp.notion.com/mcp

    Restart Claude Code, then run /mcp inside a session to see it listed as connected. Total time: about 2 minutes.

    ⚡ Copy This Prompt: Let Claude Code Install and Verify It For You

    Skip Steps 1-5 below entirely and hand the whole thing to the agent instead. Fill in the bracketed line with the server you want, paste the rest as-is:

    You have access to the `claude mcp` CLI in this project. Do the following and report back — do not tell me it's done unless step 3 actually confirms it:
    
    1. Run `claude mcp list` to see what's already configured.
    2. Add this MCP server: [PASTE THE SERVER'S NAME, URL/PACKAGE, AND TRANSPORT TYPE HERE — e.g. "notion, https://mcp.notion.com/mcp, http" or "airtable, npx -y airtable-mcp-server, stdio with AIRTABLE_API_KEY=..."]
    3. Run `claude mcp list` again and confirm the server shows as Connected.
    4. If it does NOT show Connected, do not report success. Tell me: the exact status shown, the most likely cause (missing auth, wrong URL/package name, missing prerequisite), and the specific command to fix it.

    This works because Claude Code can run its own CLI commands in a session — it adds the server, re-checks the connection, and only tells you it’s done once claude mcp list actually agrees.

    What You’ll Need

    RequirementWhy You Need ItTime
    Claude Code installedThe claude mcp command ships with it — nothing extra to install0 min
    An MCP server URL or package nameWhat you’re actually connecting to (remote HTTP endpoint or local npm package)~1 min to find
    Node.js (for local servers only)Most stdio MCP servers run via npx~5 min if missing
    API key or token (some servers)Private servers need auth headers or env vars to connect~2 min

    Step-by-Step Setup

    Prefer to do it by hand instead of delegating to the agent? Here’s the manual version of the same steps.

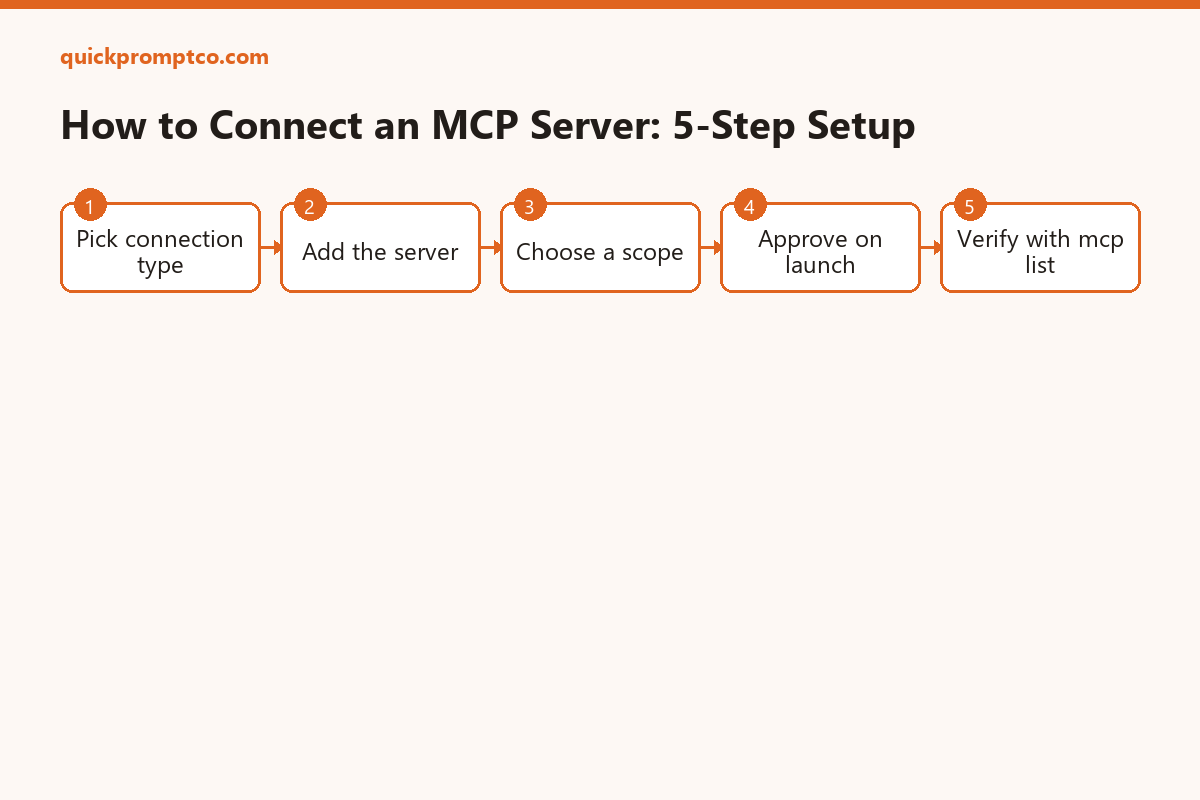
    Step 1 — Pick a connection type

    ~1 min

    Remote HTTP is the recommended default — the server runs elsewhere and Claude Code just connects over the network. Local stdio runs the server as a process on your own machine, usually via npx. Use HTTP whenever the tool offers it; fall back to stdio for local-only tools like a filesystem or browser server.

    Step 2 — Add a remote HTTP server

    ~1 min

    Basic syntax, plus a real example connecting to Notion:

    claude mcp add --transport http notion https://mcp.notion.com/mcp

    If the server needs a bearer token, pass it with --header:

    claude mcp add --transport http secure-api https://api.example.com/mcp \
      --header "Authorization: Bearer your-token"

    Step 3 — Or add a local stdio server

    ~2 min

    Use -- to separate Claude’s own options from the command that launches the server. Example: adding the Airtable server with an API key passed as an environment variable:

    claude mcp add --env AIRTABLE_API_KEY=YOUR_KEY --transport stdio airtable \
      -- npx -y airtable-mcp-server

    Step 4 — Choose a scope

    ~1 min

    User scope makes the server available across every project on your machine. Project scope writes the server definition into a .mcp.json file in the project root, so it can be committed and shared with teammates:

    claude mcp add --scope user --transport http claude-code-docs https://code.claude.com/docs/mcp
    claude mcp add --scope project --transport http claude-code-docs https://code.claude.com/docs/mcp

    A project-scoped server can also be defined directly in .mcp.json:

    {
      "mcpServers": {
        "claude-code-docs": { "type": "http", "url": "https://code.claude.com/docs/mcp" },
        "playwright": { "type": "stdio", "command": "npx", "args": ["-y", "@playwright/mcp@latest"] }
      }
    }

    Step 5 — Approve and start using it

    ~1 min

    Run claude to start an interactive session. On first launch, project-scoped servers from .mcp.json show a one-time approval prompt — accept it, and the server’s tools become available in that session.

    What Each Piece Does

    PieceWhat It Does
    Transport (http / stdio)How Claude Code talks to the server — over the network, or as a local process
    Scope (user / project / local)Who can see the server — just you everywhere, or a shared project team
    .mcp.jsonThe project-level config file that lists shared servers, meant to be committed
    --header / --envPasses auth tokens or API keys to the server without hardcoding them in the command
    /mcp panelIn-session view of every connected server and its live status

    Verify the Connection

    List every configured server and its health at a glance:

    claude mcp list

    Here’s what the status column actually looks like, and what each one means:

    ✔ notion    Connected
    ! secure-api    Needs authentication
    airtable    Failed to connect
    claude-code-docs    Pending approval (run claude to approve)

    ✔ Connected is the only state that means “working.” Everything else needs action: ! Needs authentication (add the missing token), ✘ Failed to connect (check the URL or package name), ⏸ Pending approval (run claude interactively and accept it). For one server’s full detail:

    claude mcp get notion

    Common Mistakes to Avoid

    • Forgetting the -- separator on stdio servers. Without it, Claude Code can’t tell where its own flags end and the server’s launch command begins.
    • Hardcoding API keys directly in the URL or command. Use --header or --env instead, so secrets aren’t sitting in your shell history or a committed .mcp.json.
    • Assuming a listed server is actually working. A server appears in claude mcp list as soon as it’s configured — always check the status column, don’t assume “listed” means “connected.”
    • Not restarting after adding a server. Claude Code needs a fresh session (or the /mcp panel refresh) to pick up a newly added server.
    • Ignoring a pending-approval status. Project-scoped servers from a teammate’s .mcp.json sit unapproved until you run claude interactively and accept the prompt.

    Q&A

    What’s the difference between user scope and project scope?

    User scope is private to you and active in every project. Project scope lives in .mcp.json in the repo, so it’s shared with anyone who clones it — useful for team-standard tools.

    Do I need to know how to code to use MCP servers?

    No. Adding one is a single CLI command, and once connected, Claude Code calls its tools automatically when relevant — no manual invocation required.

    Can I just have the agent do the whole setup?

    Yes — that’s what the copy-paste prompt above is for. Claude Code can run its own claude mcp commands in a session, so it can add a server and re-check the connection itself instead of you typing each command.

    Can I remove a server later?

    Yes — claude mcp remove <name> deletes it from config, and for remote servers it also clears any stored OAuth tokens.

    Why does a server show “Failed to connect”?

    Usually a wrong URL, a missing auth header, or the local package failing to start. Run claude mcp get <name> for the specific error before troubleshooting further.

    Official Resources